.png?v=1667978305)

For the uninitiated who don't yet know what dermatoscopes and dermoscopy are all about, the topic can be overwhelming. In this article, we give you a quick rundown to help get you started!
What is "dermoscopy"?
There are many ways to define “dermoscopy,” but in short, dermoscopy is the technique of microscopically examining the skin (in vivo) using a handheld device called a “dermatoscope.”
While non-microscopic visual inspection of the skin can help identify gross features of lesions, dermoscopy allows clinicians to observe changes just below the surface - from the stratum corneum to the superficial dermis. In doing so, dermoscopy greatly improves the clinician’s diagnostic accuracy and confidence level for both pigmented and nonpigmented skin lesions.
The earliest versions of handheld dermatoscopes used non-polarized light sources. The use non-polarized lighting necessitated direct contact with the skin, in which a liquid interface was required between the lens of the dermatoscope and the surface of the skin. These liquids (e.g., immersion oil, alcohol, etc.) reduced glare and allowed for visualization of deeper structures.
Polarization in Dermoscopy
DermLite was the first manufacturer to introduce polarized handheld dermatoscopes to the market.
To achieve cross-polarization, two polarizers are needed - the "source" polarized filter for the light being emitted, and the polarized "detector" filter which filters the light just prior to entering the lens.
When the “source” and “detector” filters are perpendicular to each other, this is referred to as “cross-polarization.” With “cross-polarization,” light reflected from the stratum corneum is unable to pass through the "detector" filter. As a result, it's "cross-polarization" which serves to eliminate light glare.
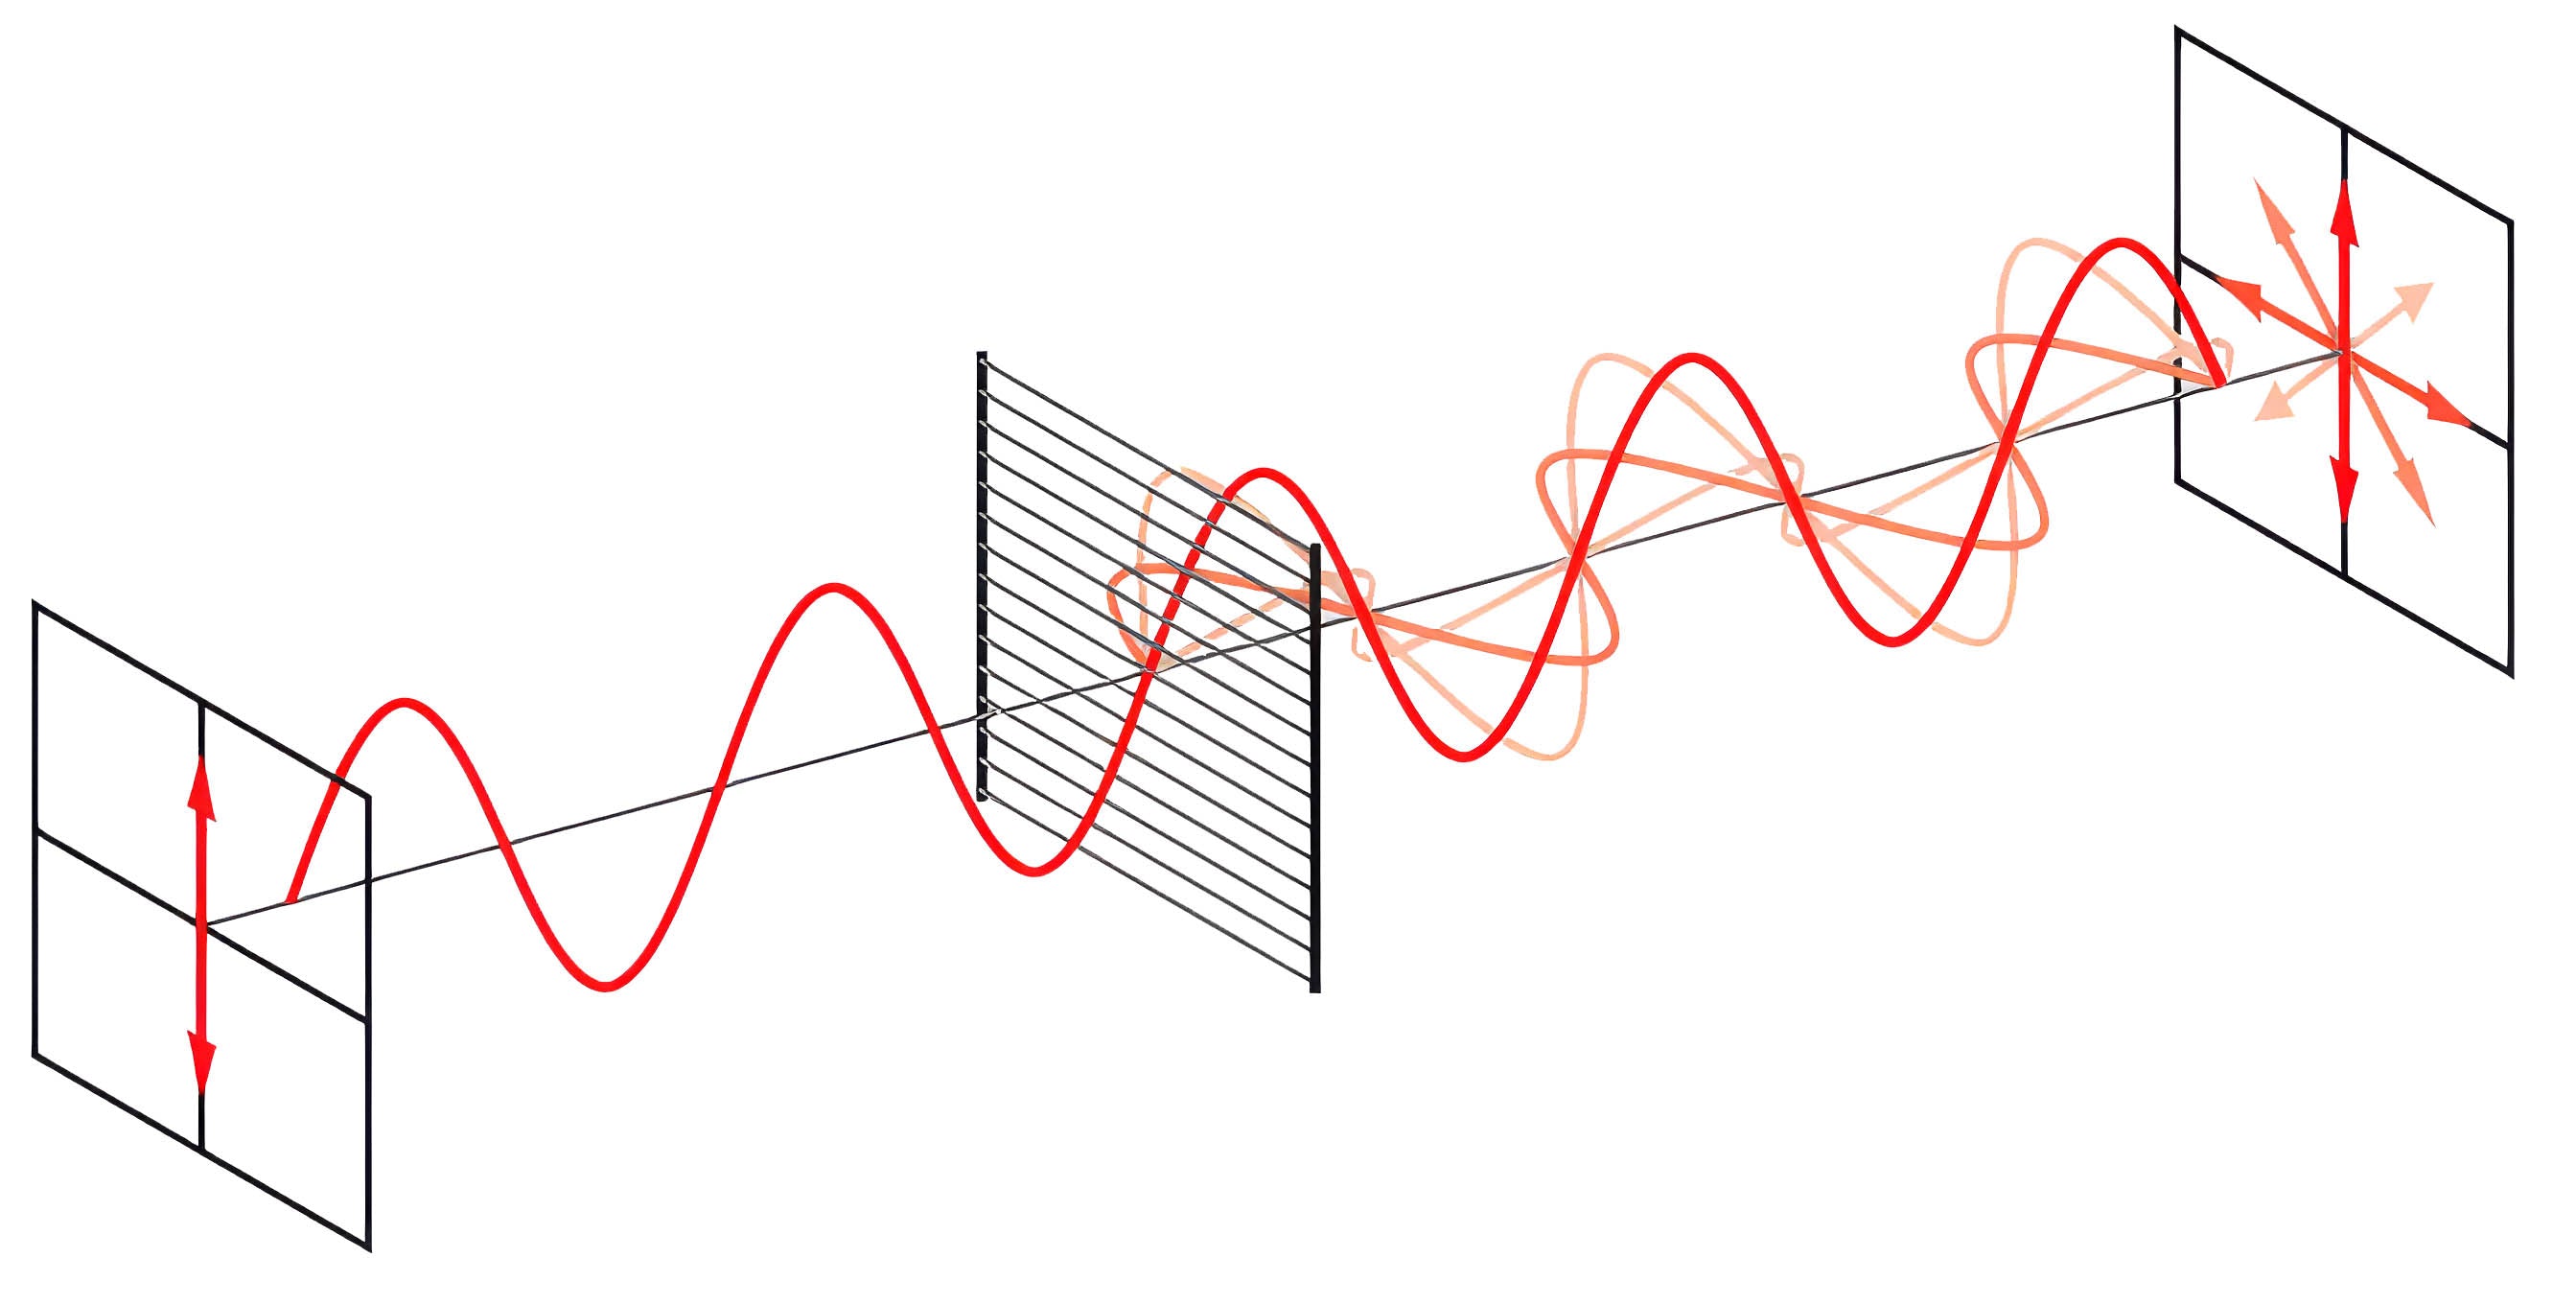
Without the "glare" (which would normally emanate from the stratum corneum) obstructing our vision, the light which penetrates deeper levels, such as the dermal epidermal junction (DEJ) and superficial dermis, experiences enough scattering to allow it to pass through the "detector" filter. As a result, polarized dermoscopy enhances the visualization of colors and structures as deep as the DEJ and papillary dermis. In contrast, superficial structures are poorly visualized.
Because cross-polarization eliminates surface glare, it does not require the use of a liquid interface or direct skin contact.
To be clear, Dermlite's introduction of cross-polarized dermatoscopes to the market is what first allowed clinicians the ability to perform much quicker examinations (as compared to the use of the original "non-polarized-only" style of dermatoscopes).
It's worth noting, however, that although polarized dermoscopy does not necessarily require direct contact and immersion fluid, some clinicians find that performing contact dermoscopy (with immersion fluid) even when using polarized light mode can, in fact, enhance the visualization of certain dermatoscopic structures and colors.
As a general rule, lesions and structures which primarily occupy the outermost surface of skin are best visualized using non-polarized dermoscopy. For example, seborrheic keratoses, milia and enlarged pores are more easily seen without the use polarization.
On the other hand, most clinically significant signs of malignancy (such as variations of color, blood vessels, and “shiny white" structures) are more noticeable using polarized dermoscopy.
These are general characteristics of polarized vs non-polarized dermoscopy, and there are exceptions. That is, some clues for malignancy are better visualized with non-polarized dermoscopy. For example, the notorious “bluish-white veil” associated with melanoma is typically better seen with non-polarized light.
Additionally, visualizing lesions in polarized light mode only (without contrasting that appearance to that of non-polarized light mode) can increase the likelihood of “false positives.” For instance, some seborrheic keratoses will appear very concerning under polarized light, whereas non-polarized dermoscopy would allow the clinician to better appreciate their characteristic (and reassuring) milia-like cysts and comedo-like openings.
For these reasons, clinicians who heavily incorporate dermoscopy into their clinical practice have found a place for both polarized and non-polarized dermoscopy.
Taking Photographs in Dermoscopy
In our modern era of Electronic Medical Records, documenting with photographs has become commonplace. Apart from “academic” interest (i.e., maintaining a healthy “library” of teaching images), the ability to document dermoscopy images serves a medicolegal role as well.
For Dermlite dermatoscopes, connecting your dermatoscope to your camera, iPhone, or iPad is easy with the MagnetiConnect system.
What is "MagnetiConnect"?
MagnetiConnect is Dermlite's proprietary system of connecting our dermatoscopes to our imaging device (camera, phone, or tablet). MagnetConnect is based on the principle of first attaching a magnetic ring to your device (via iPhone-specific cases or adapters such as the MagnetiConnect Clamp).
Once applied to the iPhone, tablet, etc., the “magnetic ring” (which is placed around the device’s lens) then “magnetically connects” with its counterpart ferromagnetic ring which is incorporated into the MagnetiConnect-compatible dermatoscope (surrounding the lens).
Fortunately, most Dermlite dermatoscopes are now MagnetiConnect compatible. However, there are some notable exceptions (i.e., dermatoscopes which are not MagnetiConnect-compatible). Currently, the Dermlite dermatoscopes which are not MagnetiConnect compatible include the DL100, the Dermlite Carbon, and the Lumio S.
It’s worth noting that the MagnetiConnect system serves the purpose of making the process of taking dermoscopy photos and video easier. That is, just because a given dermatoscope isn’t MagnetiConnect compatible doesn’t mean that photos or video cannot be taken using that device.
For example, clinicians who use one of the non-MagnetiConnect-compatible dermatoscopes (such as the DL100, Carbon, and Lumio S) can still take photos by simply holding their device’s camera lens up to the eyepiece of their dermatoscope. It may not be the most “elegant” method of taking photos, but it can work!*
For academic institutions (or really anyone with a serious interest in dermoscopy imaging), specialized dermatoscopic camera lenses also exist, which may be more convenient to use compared to handheld devices connected to a camera. These specific lenses may also enable the capture of sharper and clearer pictures in comparison to those taken with handheld equipment.
*There is one important caveat with respect to taking dermoscopy pictures by "just holding your camera up to your dermatoscope." Depending on the device, this issue can also complicate matters even for those who are using a MagnetiConnect case or clamp.
The problem which some have experienced is that when trying to take photos with their dermatoscope, just as soon as the image starts to focus, the image suddently gets blurry and/or abruptly moves out of frame. This is is a known issue that can occur when modern "multi-lens" smartphones (or other devices) automatically switch camera lenses.
It happens because the device is trying to choose the "best lens for the shot" (out of its multiple available lenses). Just as the image starts to come into focus, the iPhone (or other device) perceives that one of its other lenses might provide a better result. So it abruptly "switches" to that other lens. Everything is adjusted, the image again starts to come into focus, but then it does it again, and again, and again...
To prevent this from happening, you can go to your device's camera settings and disable "automatic lens switching." On some devices, this setting is called "Lock Camera," while in other devices it's labeled "Macro Switching." It may even go by other names depending on the manufacturer. When in doubt, just do a Google search for "[device name] turn off automatic camera lens switching" and you should find the instructions you're looking for!